


So this is a pretty large mini kit folks! LOL! There are approx 23 files in this freebie, but only because I wanted to give you options. I've included full .png files of all the elements (hat, noisemaker, title, the two banners and some little star gems) but I've also included the .psd files and separate .png files of each PART of the element so that you can alter them (EASILY) any way you want. I also included a photo taken in Times Square on New Year's Eve (I used to live there) that I tried to make into a cool background paper, I'm not sure how well I like it, but I worked so hard on it, that I wanted to include it! LOL
The reason for the number of files is that for example, the noisemaker comes just as it is in .png format, AND you can, either with the .psd (photoshop or photoshop elements) files or with the separate .png file,s change the color of the ribbon, and both parts of the noisemaker. So for each image there are several different files and file types.
NEW BLOG ELEMENT - a "CBox" I've been getting quite a few questions on my comments pages and I have no way to answer individuals without posting to the entire community. So if you have a specific comment or question (like what font I used for example) simply email me directly at PineapplePlantation@gmail.com OR post your question in the CBox. You can add your email address there if you'd like and I can email you directly back, or I'll check the chat often and post answers to your questions there! I'd love to hear other chatter as well, (great places to print your layouts, other great freebies, links to YOUR blogs for us all to find, etc.! Have fun with it!
Lastly, TWO Photoshop Tips & Tuts for tonight's freebies ladies and gentlemen (are there any gentlemen? ) the first is a quick and easy way to re-color the elements (say for your child's birthday party layout etc.) Simply take the .psd template with each part of the party hat on a separate layer, or open all three .png files if you're not using PS/PSE. Choose your layer or file that you first want to re-color. Load the selection for that entire file or layer (not sure how to "Load the Selection"? Click HERE for an earlier post that has directions). Choose the color that you want to change the element to and make sure that it is your FOREGROUND color (remember the two tiny little boxes at the lower left side of your workspace in PS? it's the TOP one) once your color is selected and your layer is loaded, simply click OPTION>DELETE for Macs or ALT>DELETE for pc's, this command tells photoshop to FILL the selection with the foreground color (want to use your BACKGROUND color?? Easy! Just click COMMAND>DELETE for mac's or CTRL>DELETE for pc's!) This works for ANYTHING that you want to fill.
Second tip for the day: VERY useful for the .png files of the party hat and the noisemaker. I've created the files so that they line up perfectly if left just as they are....but how do you do that if you have three different files? Easy!If you want to drag an element, say the ribbon for the noisemaker I've included, into another file, and you want to line it up JUST as it was in the first file, AS YOU DRAG THE FILE, HOLD THE SHIFT KEY, only let go of the shift key once you've "dropped" the file you were dragging. This will either center the file you are dragging, (say a full sheet of background paper) or in the case of the noisemaker, it will drop your ribbon exactly were it had been in the last file, so that it lines up with the rest of the elements.
Does that make sense?? LOL Try it and you'll see what I mean!!
Have a happy and safe new year's eve everyone! I'll see you next year!!
Aloha - Hau'oli Makahiki Hou! (Happy New Year in Hawaiian!)
Download HERE
Monday, December 31, 2007
12.31.07 Happy New Year!
Sunday, December 30, 2007
12.30.07 Corrected Files Links!
Ooops! Thank you to Cathy Davis for her email to me letting me know that both todays freebie and yesterdays freebie had .psd files instead of .png files in them that everyone could use! I've updated the links and you can download the corrected kits simply by clicking on the original links. That's what I get for posting at 3:00 a.m. I guess! LOL
Shauna
12.30.07 Cold -n- Cozy Mini Kit and Sneak Peek

So, GOOD NEWS! I'm keeping the new blog header, by an overwhelming vote it won! But for those of you who like the "less grungy" look, I'm pulling out a bit of the January portion of my new multi-kit project I've been working on for Digital Candy. It is definately not grungy, it has a bit more of my "cutesy" side in it. The mini kit has 3 papers (hard to see the white one has tiny blue snowflakes on it) some mittens, a snowflake and a snowman.
MORE good news! Heidi, owner of Digital Candy, left a comment on yesterday's post assuring me that indeed, I will have my own creative team!! YAHOO! I'll have to do a bit of research on how to go about "officially" putting out a CT Call, but in the meantime, my faithful blog readers, you have a head's up...please send me your work with my freebies (certainly add your touches, elements etc. to the layouts as well though!) Email them to me at PineapplePlantation@gmail.com!
It's late again (or early, whichever you prefer! LOL) so for my Photoshop Tips & Tuts I have two more of my favorite shortcuts! To switch between your foreground color and background colors quickly (the two tiny little boxes in the lower left hand corner of your workspace), simply press X on your keyboard! To zoom in on your project for detail work press COMMAND and the plus sign for macs or CTRL and the plus sign for pc's, keep pressing it to zoom in further, then zoom out just the same, but by pressing a minus sign instead!
Any time that I can save these days while on Photoshop is a blessing, so I love my shortcuts!!! LOL By the way, I got my Costco coupons today and they have a huge coupon for the latest version of Photoshop Elements! After the coupon it's only 50.00! (might be less outside of Hawaii, I'm not sure) Check it out!
Much aloha - thank you SOOOOO much for all of your kind comments and emails! Please keep them coming, your support keeps me going!!
Much aloha - Shauna
p.s. for those who asked via emails and comments: the font for my new header is Bleeding Cowboys (awful I know) it's a FREE font from Dafont.Com click HERE to download the font now !
p.p.s YES! I am definately keeping the name Pineapple Plantation Designs if and when the Army deems it time to move us from paradise! Thanks for the question Missy!
ok! I'm finished now, I promise!
Click HERE to download the corrected link!
Saturday, December 29, 2007
12.29.07 Writers Block Mini Kit - Creative Team?

Ok, it's 3:00 a.m. here in Hawaii, my back is sore from "bowling" with my 7 year old all night on his new Nintendo Wii (a LOT of fun by the way, the whole family bowled for hours!) and I'm exhausted, but desperately trying to get all of my new kits finished for my "grand opening" at Digital Candy. Although...I was distracted enough from my working today to create a new Blog Header!! Do you like it? I SO love the grungy look in my scrapbooking, I thought it should reflect in my header (with some girly swirls of course!) My husband said it was "too dark"... Let me know what you think of it in todays poll would you??
You voted for Mini Kits, and so you shall have one! (didn't vote?? Well then, you can't complain! LOL don't worry, I have a new poll tonight, you can vote THIS time!) I once again have taken a bit from one of my new kits called "Writers Block" (hint... it's part of multi-kit calendar pack - September to be specific!).
It's pretty simple really, 3 papers, one piece of notebook paper, one striped paper and one with some vintage writing on it. The elements I included are a worn leather journal and a fountain pen - I can't wait to see what you do with them!
By the way, I'm not yet sure how it works at Digital Candy, I know that I'll have access to a Creative Team, but I'm not sure if I'll get new people who I choose (my preference) or not, but PLEASE! If you've done some work with my freebies, please email them to me! I'd love to see what you're doing with everything, and I will certainly keep the email addresses of those who inspire me in case I'm allowed to form my own team!! Simply submit WHATEVER you're doing with my freebies, cards, layouts, printables, tags, you name it to... PineapplePlantation@gmail.com. I'd love to post some of them on the blog as well!
My eyes are drooping now, so the PHOTOSHOP TIPS & TRICKS will be a quick one... I LOVE shortcuts and Photoshop has tons of them (you can even create your own, but that's for another day...lol) One of my favorites is COMMAND>OPTION>Z (for a Mac) or CTRL>ALT>Z (for a PC) to Undo. I know that Elements has a quick button to undo, but Photoshop does not, and frankly I'd rather use my keyboard then scroll around and click with my mouse any day! Unfortunately, I use this shorcut so much that I'm a PRO at it and can use 3 fingers in just a millisecond to undo a mistake!! LOL
Much aloha my friends, and remember you can't be creative if you're afraid to make mistakes, dare to be imperfect and create something beautiful today!
Shauna
Click HERE to download the mini kit!
Friday, December 28, 2007
12.28.07 Charm Frames & Ribbons + New Blog Elements!

Hey! I've added a couple of new items to the blog, one is a poll (directly to your left) PLEASE take the time to answer the questions? I really want to spend what little time I have these days creating your freebies on stuff that you REALLY want! So I'll be asking things like, what type of freebies you like (today's question) or what style, if you like multiple items that are different colors or just one...etc. etc. I'm really interested in what you like and want so if you could take just a second I would REALLY appreciate it!!
I've also added a labels list (a bit further down on the left) so that newcomers can spend less time looking for what they like, and more time downloading it! LOL I'm adding labels like "quick pages" "mini kits" etc. to my posts, so just click on what you want and all the posts with those tags will show!
REMOVING LINKS!! Also, I'm getting a bit low on space for my 4shared account, so I will be editing out some of the links and removing them from my space...if there is something you would like, please take some time and download them so you don't miss out!
I'll also be adding a new little "element" to my blog called Photoshop Tips and Tricks! The little tidbits won't be full tutorials, but just quickies like shortcuts or timesavers. Hope you enjoy them!!
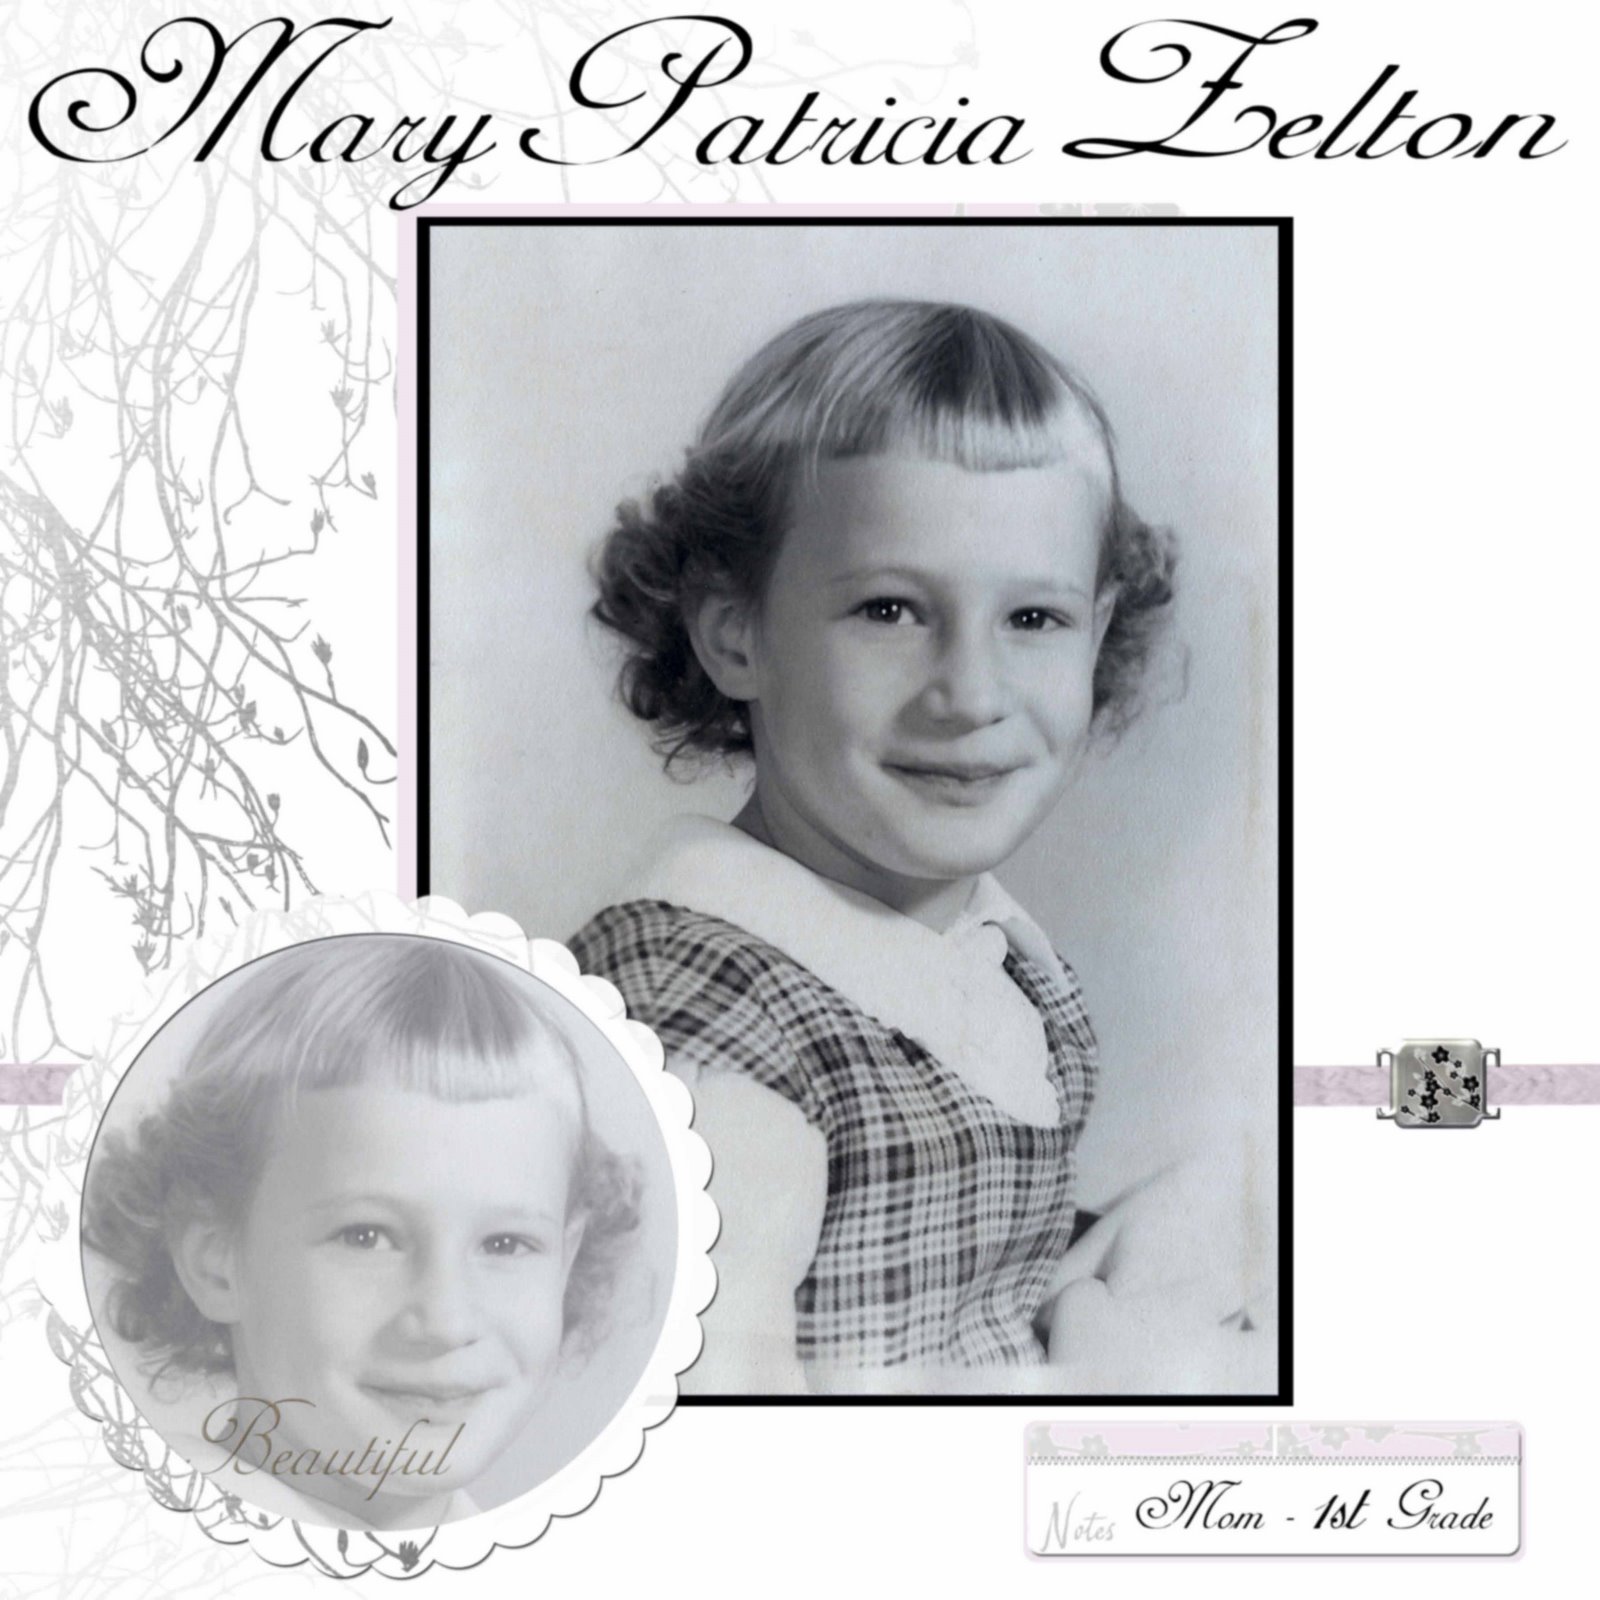
Today's freebies are some cute little charm photo frames (or journaling frames, or whatever! LOL) and little ribbons to "hang" them from. I'm actually NOT a vintage, sort of artsy kind of scrapbooker (believe it or not!) but I've been working on an album of my mother's childhood for my grandmother and so I guess I've been in that kind of mood! LOL
The frames are large so that you can resize them as large or as small as you need them: TIP attach the ribbon of your choice to your frame and then either link or merge the layers BEFORE you resize the frame, I've created the ribbons to fit the frames at this size and you'll have some tweeking to do if you size them seperately. The frames and the ribbons are all separate in the file, so you can use one or both separately if you'd like!!
PHOTOSHOP TIPS & TRICKS OF THE DAY: GUIDES! They're a wonderful tool to line things up just as you'd like them to be! Simply have your MOVE tool selected and click JUST to the left, or just on top, of your open file (inside of the ruler if you have them showing) and drag to the right or down. A tiny blue line will appear and land wherever you "drop" it. If you have several words that you want to line up, or perhaps ribbons or frames, just line them up against your guide! If you want to move your guide simply select your move tool then move it over the blue line, your cursor will change to two small lines and two tiny arrows, now click and drag it where you want it! CAUTION! If you save your file, the guides WILL stay, so before you save your item for the final time, simply click VIEW>CLEAR GUIDES and Poof! They're gone! Now you "type A" personalities like me will have everything lined up and "perfect" everytime!!! LOL
Aloha!
Shauna
Click HERE or on the title to download!
Thursday, December 27, 2007
12.27.07 Vintage Grunge Mini Kit +Template Tutorial

Well, I hope that your Christmas went as well as mine did! Between my 7 year old's reaction to his new Wii (I waited in line for 5 hours to get it, he BETTER be excited!) my 13 year old's excitement over her new MacBook laptop and my 15 year old's scream of joy over her new iPod and accessories, it was a merry Christmas all around (although, I've officially resigned as our family's, tech person after a Christmas filled with electronics, it was still better than the Christmas filled with Barbies, GI Joes and THOUSANDS of metal twist ties that took hours to free Barbie, Joe and all of their accessories!!)
So! On to another Freebie - I have finally come down to pilfering from some of my new kits that I'm designing for Digital Candy! LOL and this is a peek at my Vintage Grunge Kit - I really love mixing styles (elegant+grunge etc.) and this is a tiny glimpse of that!
The mini kit includes: 3 of my favorite grunge papers from the kit, a paper flower, a diamond stick pin, a small "memories" element and a library pocket with a template. I've had great response to my small tutorials, so here's another! This time I'm going to teach you an easy way to be able to place something "inside" of your library pocket (a great place for maybe some journaling on a tag or something!) Again, this tutorial is for Photoshop (PS) or Photoshop Elements (PSE). If you have any questions, feel free to email me at PineapplePlantation@gmail.com !
Ok - You'll need to take whatever you're going to place into the pocket, and the template I've enclosed (both in PS/PSE format and a .PNG format) and drag them both into a newly created document (so you keep the original of both individual items for later) that is larger than both of the elements to give you some room to work in. Be sure to create your new file with 300 dpi and with a transparent background.
Once you have both elements in the same file, make sure that the template (which, by the way, looks exactly like the top of the library pocket) is on a layer BENEATH the other element in the layers pallet (don't see the layers pallet? go to WINDOW>LAYERS and it should appear). TIP - resize your ELEMENT if you need to, NOT the template, as it is the exact size you need it to be when you put it on top of your pocket.
Now adjust your element by turning it, or moving it up and down etc. Everything above the bottom of the template will eventually show on your layout.
Once you've done this, then LOAD THE SELECTION of the template (done by doing a special click directly on the thumbnail picture of the template inside of the layers pallet - Ctrl+Click on a PC, Command+Click on a Mac) this should give you a bunch of "marching ants" around your template. Now click SELECT>INVERSE (select is found on the top menu bar). This allows you to work on everything EXCEPT the template inside of your file. If your pocket element does NOT go above the top of the template, you can simply click DELETE and everything outside of your template will dissapear, if your item DOES go above the top of the template, then simply use your ERASER tool (a nice round, hard brush with 100% opacity is perfect). Make sure that the layer with the ELEMENT is active since that is what you want to erase. Then erase everything below the bottom of your template. This creates the illusion that your element is inside of the pocket once you place the template on the library pocket.
By selecting the template and inverting the selection, it allows you to erase with ease, as it preserves everything INSIDE the marching ants, even if you run over it with your eraser, so you don't need to be careful about getting too close to the template or your element that will show (took me awhile to figure this one out, but it saves TONS of time!)
Now, DESELECT your template (Command D on a Mac, Ctrl D on a PC, or SELECT>DESELECT).
Now, while you have two different layers make any adjustments to the layers that you want (maybe add a drop shadow to your element so that it gives it dimension, maybe bevel or emboss it, whatever you like!) Once you merge the layers to add it to your layout you won't be able to make changes to JUST the element.
Once you're finished, simply merge your layers (SHIFT+Command or Ctrl+E to merge all visible layers) and ta da! You've got the top of your pocket finished! Now drag your pocket into this file, placing it BELOW the template and element in the layers pallet, align the two elements so that you can't see the top of the original pocket. Now merge the layers again and TA DA! You've done it!! Simply save your new finished pocket as a .PSD or .PNG file and drag it to your layout!
Please don't laugh at me, but I'm a visual learner so I've visually shown the steps in a photo below for those of you who, like me when I first began, was a bit lost with written directions!!! LOL
I hope this makes all makes sense! OL it's 3:00 a.m. Hawaii time and I'm a bit groggy! LOL email if you have questions, and have fun!
Shauna
Click HERE or on the title to download the Freebie!
Sunday, December 23, 2007
12.24.07 My (Surprise) Christmas Gift to You!

Are you all crazy yet from shopping, wrapping, shipping, singing, eating, drinking and otherwise being merry?? Well, I hope you're not too tired to open one last freebie from me until after Christmas - I'm taking a couple of days off to spend with my family, but I wanted to wish you all a very merry Christmas with a little something from me. Its a few files, some that I meant to post for Christmas, but never did, some that I just put together today and one very special one.
You see, in my family, one of my most treasured Christmas traditions is to read 'Twas the Night Before Christmas to my children every Christmas Eve. I know it by heart by now, but I still love our raggedy old book that I've held in my hands as my children have gathered around me each year on the night of December 24th. I love how even at 15, Brittany still gets excited to hang her stocking afterwards, lay out cookies for Santa and carrots for his reindeer. I love reading by the light of the tree and wishing that they would never grow old. I made a special page this year to scrapbook this tradition with my family, and I want to share it with you as well. I hope you enjoy it, and your holidays...
See you soon -
Mele Kalikimaka my friends....
Shauna
Click HERE or on the title to dowload
Saturday, December 22, 2007
12.23.07 Christmas Woodcuts Mini Kit & Quick Page

The Quick Page
Preview of the mini kit!
So here's what I did with yesterday's post, I like the primitive style of the images, I thought they would look good if made to look like carved wood - I also made some great grunge grid paper that I am definately going to use some more!
The little kit includes wood cuts of all of yesterday's images, the grid paper and a QP that I did with the elements - enjoy!!
Shauna
Friday, December 21, 2007
12.22.07 Primitive Christmas Images+Brushes & TUTORIAL!

So in the spirit of trying new freebies, I've included with these 2 sets of little primitive Christmas images (one "clean" and one "grungy") AND identical sets of .abr brushes!
Brushes are probably my FAVORITE Photoshop tools! You can take images and make them huge, turn them, use them like stamps - fun fun fun!
If you don't use brushes or don't have PS or PSE, no worries! I've included the .png files of both sets of images for you to use as well!!
Just in case you need to know:
Directions to load brushes in Photoshop and PSE - There are two ways to load and use brushes in PS and PSE. You can either load them permanently into Photoshop (by permanently I mean that they are there every time you open PS and only go away if you remove them from the presets folder) this way is great for brushes that you use often, but if you load too many into the software and it begins to take a long time to start your program up. If you choose to use this method, find your PS/PSE folder in Applications (Mac) Program Files (PC). Look for your PS/PSE folder, inside of there is a PRESETS folder, in there is a BRUSHES folder. Drag the .abr file into that folder and the next time you start your program, you can find your brushes by clicking on the fly out list (#1 on my screen shot below) this will give you an image of your currently loaded brushes, those ready to use right now. Now click on the teeny tiny arrow on the far right hand side of your fly out list (#2 on my screen shot below) and this will give you a list of all the brushes in your Preset folder. Your new brushes should be listed here if you have restarted your software. Look for PPD Christmas Brushes and then click on it. This will give you the option to APPEND, your brushes (add to your currently available brushes), CANCEL the request, or OK to replace the brushes that you have in your tool right now. If you want to use other brushes as well as the newly loaded ones, simply click APPEND and they will all be available to you. If not, you can replace them and only the new brushes will show in your folder.
The SECOND way to keep brushes is to have a folder on you computer named Brushes (or whatever! LOL) and store all of your .abr files there. When you want to use your brushes simply click on the first fly out menu (#1 below) and then the second fly out menu (#2 below) and click LOAD BRUSHES. This will leave you with the option to find your brushes, navigate to your BRUSHES (or whatever...LOL) file. Choose the file that you want, double click it and it will take you to option to APPEND, CANCEL or OK to replace your current brushes. This is where I keep most of my brushes so that PS doesn't take so long to start up. Keep in mind that you should name your brushes something descriptive so that when you are searching through your .abr files you can easily find what you need!
CLICK IMAGE TO ENLARGE
Hope you enjoy your images AND your brushes...have fun with them! And PLEASE...if you have questions, post them in the comments or send me an email!! PineapplePlantation@gmail.com
Aloha -
Shauna
Click HERE or on the title to download
Thursday, December 20, 2007
12.21.07 Vintage Santa Locket Mini Kit & New file type!

I guess I was in the mood for some vintage elements because I have another mini kit for you with a vintage type santa!
I thought I was a bit burned out on creating things for Christmas, but this little kit just came to me! I also tried something new in this kit, please let me know what you think about it. The little holly frame in this mini kit has come in two different forms, I have it there in .png format, as always, including the photo template, but this time I also included the .psd file as well for those of you who use Photoshop and Photoshop Elements.
If you have PS or PSE then you can open up this file and there will be several layers. One will be the frame, with a layer with typed instructions on it just above it (Delete this layer when you're done with the instructions) then below it will be the clipping mask layer - it's called Your Photo - and then just below it will be the photo template. All you need to do is to copy and paste your photo onto the clipping mask layer and then you can click and drag the photo to where you want it, then either merge the layers and save, or if you want to use the frame again later, simply leave the layers as they are and save your photo and frame into a new .png file!
It's super easy - please let me know what you guys think, or if you have any questions or problems!!
Aloha!
Shauna
12.20.07 More Dear Santa & Quick Page

Thank you all so much for your many kind words and Christmas cheer! There was such an overwhelming response to my little kit yesterday that I decided to do another quick page with it - I think I like this one even better! LOL I also included the red Santa overlay (same as yesterday, but with a red color overlay and turned in the other direction). Also included are the elements from yesterday's Happy Holiday book in the mini kit. I had a few people email me and ask me for them individually - so here they are! If you like the papers (background, and for the holly) feel free to head to designer digital...they're this week's ad challenge freebie!
Thank you again for all of your comments - if you really like my work, do me a favor and click on some of the links along the bottom of this page! They have some great freebies for you, and they help bump me up on their lists so that others can find my freebies too!
Much aloha -
Shauna
Sorry! This post has been edited to remove link
Tuesday, December 18, 2007
12.19.08 Dear Santa Mini Kit + A bit of a RANT and a TUTORIAL!

Ok, first off - I know that I said that I should kill two birds with one stone and make my freebies some of the stuff that I'm working on for my new venture with Digital Candy, but I've been working on this Santa for some time now for a page of my mother on Santa's lap as a child and I was SOOO thrilled with how it came out that I had to share it with you. I also made a few items to go with it - a plaid page that matches the color of Santa's coat, a distressed parchment page, a little book with santa on one page and "Twas the night before Christmas..." on the other, and an ornate frame that seemed to me to go well with Santa - which brings me to my rant (in a weird sort of backwards way) I also made a photo template for the ornate frame which, IMHO (in my humble opinion) NOT enough designers out there do! And a quick page using most of the kit. Oh! And I also threw in the santa with NO coloring - in case you would prefer it that way! (here comes the rant part).
I've only been part of this community for a couple of months now, but I've found quite a few things that many designers don't do, and I'm a bit frustrated! When I started digital scrapbooking, I began to buy a few (OK OK, lots) of stuff from several stores. I quickly learned that quite a bit of the freebie kits out there were pretty hard to work with, and a few of the kits I purchased were too for that matter! There is only so much that a person can do with ribbons, bows, buttons and square frames! In addition, when I found a pretty frame that I liked, it was next to impossible to get my pictures to fit it (ergo, I assume the multitude of simple square frames). Why not put in the little blob that they used to "cut" the frame with? It wouldn't be that hard would it?
And in a kit, with some cute elements, quite a few of them were colored in such a way that I could only use them with certain papers, as they were too hard to re-color or "take apart" to use them with different kits etc. Can't they just "throw in" a blank frame or element, so that I can use it more often? (example - with my beaded ornaments, If I were a reader of this blog, I would have loved the little ornaments, but I think half the fun of downloading that little freebie would be to play with the beads and see what I, as a scrapbooker, could create with them) Whew! done with the rant LOL
Ok, so the good news is that I am going to try and NOT follow in the footsteps of those designers... I mean, anyone can re-color a ribbon or button right? (if you cannot, for goodness sake email me! You are spending WAY too much money on elements if so!! LOL)
Ok...back to the freebie (sorry for that...LOL...had to get it off my chest!!) Anyway, I put in my little "blob" so that you can use it as a template for your photo, that way it will fit in there perfectly with no overhang. If you don't know how to use the template feel free to email me with questions. I am really only familiar with Photoshop and Photoshop Elements, but it is really easy in those two programs. Simply use a clipping mask or, put the "blob" (hereinafter to be known as the template LOL)in its own layer and load the selection by clicking on the thumbnail of the template (Command+Click on a Mac, or Ctrl+Click on a PC) that creates a selection the shape of the template, then click SELECT>INVERSE. Then place your photo, or paper or whatever on another separate layer and activate THAT layer, then click Delete or Clear. By inverting the selection of your template you are telling PS or PSE to erase everything outside of that template. So whatever layer you activate, and then click delete (with the selection, or "marching ants") still active on, with end up in the shape of the template. A clipping mask is MUCH easier but as I have have only done this in PS CS3, I'm not sure that the directions for that are the same otherwise.
If you still need help, PLEASE feel free to email me at PineapplePlantation@gmail.com!
Ok... enjoy my little hand painted Santa, I REALLY do love him, (he's perhaps one my favorite elements I've ever created) and as always...if you would like to share a layout made with my stuff, PLEASE PLEASE PLEASE email them to me!! (Please??)
Much aloha my friends,
Shauna
*Sorry! This Link has been edited to be removed*
Monday, December 17, 2007
12.18.07 Christmas Ornaments & Ribbons

Ok, so doing daily freebies and getting my kits together is proving more difficult than I thought! LOL I think I might start having to give you guys some "sneek peeks" at some of my new kits instead of creating all new stuff for you! It won't be Christmas stuff, but then again, you might be ready for some non-holiday stuff by now anyway... I hope so! LOL
Ok, so for today's freebie - just some ribbon wraps with silver Christmas Ornaments for layouts or frames if you crop them, as well as some "hanging" ornaments. They are all attached to red ribbons, but I've included green ribbons if you want to change them out!
Enjoy!
Shauna
Click HERE or on the title to download
Sunday, December 16, 2007
12.17.2007 Christmas Rub Ons & Bling!

Just a quickie today folks! Busy busy busy...(not to mention Christmas cards still to send, presents still to buy and wrap, cookies to bake) Wow! Is Christmas really just days away???
Enjoy!!
Shauna
Click HERE or on the title to download
Saturday, December 15, 2007
12.16.07 Crystal Beaded Christmas Ornaments

Remember these? My son brought one home the other day, he had made it for our Christmas tree. It inspired me to try and make them digitally (might have been easier to go to the craft store, buy the beads and wire then string them once I got home and scan them in...but whatever!) There's a certain thrill in creating something completely on the computer (I think I'm becoming a digital geek! LOL)
The ornament that Ethan brought home reminded me of all of my favorite ornaments. I have a pretty eclectic tree. Wherever we go I buy an ornament and I've mixed them with all of my favorites as a child. My tree has Waterford crystal ornaments, small wooden ornaments from my favorite Christmas store in the world!(If you haven't been there, you simply must go!) all the way to paper ornaments made by my children that I've lovingly packed away each January to try and keep them safe until next year. I even have the ornament that my family chose to place on the tree at our family cemetery the year after my mother passed away. But of all my ornaments, the ones that my children made with their little hands are far and away my favorites. Every year, just when I think I'll pull my hair out because of all the little details and jobs that the holidays inevitably bring, I get to sit down and unwrap all of our family Christmas ornaments. Every one I unwrap brings back wonderful memories, better than any scrapbook I've ever made.
So - while these may not bring back any warm memories of Christmas' past for you, I do hope they represent some of those long ago days when our little ones came running home from school with a (let's face it) hideously wrapped gift made of popsicle sticks (with almost all of the former red popsicle stains off of them) glue, glitter, sequins and yarn. Only to rip open the gift themselves and happily run to your meticulously decorated tree and hang their gift right smack dab in the middle of the front of it, with a huge smile of pride on their faces.
That is, after all, what Christmas is really all about itsn't it?
Mele Kalikimaka to you all -
Shauna
P.S. Why should the kids get all the fun? I've included my single beads so that you can make your own!
Click HERE or on the title to download
12.15.07 Peppermint Mini Kit
So I am CRAZY busy trying to get my kits ready for my grand opening at Digital Candy - you guys will all be there won't you?? I'm finding it harder and harder to design for the new kits and make freebies for you all, but I'm doing my best!! Hang in there with me will you? It might be awhile before I can make a big kit for the blog, but keep coming back, I promise that I'll try to make it worth the trip!
Here is a tiny kit. I made it for a layout with my son Ethan (now 7 years old, if that tells you how far behind I am in my scrapbooking! LOL) I have a link to my LO with my last post. I've included the papers, ribbons and buttons as well as 2 quick pages for you.
Enjoy and thanks for the comments of support! You are all the best!
Shauna
*Sorry! This post has been edited to remove link*

Friday, December 14, 2007
12.14.07 Merry & Bright Quick Page Layout + GREAT NEWS!!

So, great news first!! A few days ago I submitted the link to my little blog here to a great online store called Digital Candy to be on their creative team. (Click the name to check it out!) The owner of the site emailed me back to let me know that instead of being offered a position on their creative team, they wanted me to be an exclusive designer on their site! Can you believe that?? I haven't been doing this very long (less than 2 months) and then this!! So I signed the contract today and it's official! No worries though, I'll still have freebies for you every day, so please keep coming back! You guys have made this little blog a pretty big deal! Yesterday I had over 1000 unique hits to the site!
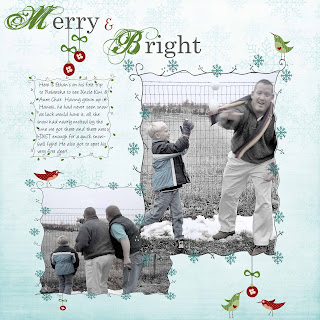
So anyway, what you want to know about...the freebie! LOL There's another great site out there owned by a really inspiring designer Katie Petiet called Designer Digitals. Every Sunday they give out Freebies and have challenges for you to use them and then post them in their gallery. I really liked the ones they had this past weekend, and I made a Quick Page out of them. If you want the original elements, feel free to check out their site and you can download them there. In the meantime the freebies that I have for you are: my QP and the elements that I created to go with it (the snowflake frame, a blank vine frame and the paper used for the background so that you can make a double page layout if you like!
Thanks again for all the comments and moments of shared laughter with my little 80's theme posts for the last two days!!
Oh! And here's the LO that I did with the QP (had to pick from the VERY few winter photos I have! this one is of my little Ethan's first snowball fight with Dad in Nebraska!
Much aloha -
Shauna
Click HERE or on the title to download
Wednesday, December 12, 2007
12.13.07 Preppy Kit Elements

Yes...to all of you who asked, apparently stirrup pants are on their way back. Although right now they are really just "leggings" where you have to purchase the double clipping "stirrup" seperately ( "Duh Mom" and I quote "did you think they came attached to the pants"? SIGH) But can the traditional "attached" stirrups be far behind? Perhaps I should give up my dream of becoming a digital designer and make my fortune designing the stirrup pants of "today"?
Let's see..they would definately still have an elastic waist and they would still be made of material that was comfy (hello...the only good thing that they had going for them) but the material would somehow (magically perhaps?) suck the wearer in by at least...let's say... 3 sizes, while still remaining comfortable. (That's not asking too much!) and they would hide any and all "dimples" (ok, now perhaps I've gone too far) The stirrup would, while remaining attached (yes, Brittany, they were at one time actually attached, SIGH) so that young wearers would not lose them (no, Brittany, I do not know where the other one of your "clippy things" are that we just purchased yesterday). Yet never become "crunchy" after being worn in shoes all day then thrown in the hamper and left to dry/harden, or become stained after being worn with dirty feet and no socks. They would also NEVER shrink so that they rode up your legs, showing WAY too much of your socks and looking like highwaters or, worse yet, riding up your backside. They would be durable, never pill and they would cost next to nothing to produce so I could make a million and yet sell them inexpensively to the throngs of people lining up to buy them... SIGH...
Ok enough dreaming...back to reality where stirrup pants are actually a bad idea, but nevertheless making a comeback, and where I give you all another new freebie!
Here they are...after rambling on and on about pants I won't drag this out - I've got some tags, some frames, an alphabet, some journaling squares, ribbons, eyelets, gems and word art for you! There are two sets of the word art (one has "bling" already attached to it - have to have a bit of bling) - and some little embroidered buttons. (where if you layer them and add them to the ribbon they make a cute little frame wrap! (example on my layout shown here: (Ethan's One and Only Winter Outfit EVER!)
Enjoy!
Shauna
Click here or on the title to DOWNLOAD
Tuesday, December 11, 2007
12.12.07 Preppy Kit Papers

Ok, so a couple of weeks ago my 15 year old daughter asks me if she can get a pair of "stirrup pants", she doesn't quite know what they are, but her friends are getting them so obviously... LOL. "stirrup pants" was my reply, "Stirrup pants are coming back in?" At first I was thrilled, ooohhh...comfy pants that I can dress up or down, with an elastic waist"?? My heart beat a bit faster, then it sunk just as quickly as images of women MUCH older than me at the time (probably younger than me now) wearing them back in the 80's, I remember looking at the "dimples" on their rear cheeks and wondering why on earth they would wear something so unflattering....SIGH... so much for comfy pants that I can dress up and down...with an elastic waist to boot... I'm afraid that after 3 children and quite a number of years,I have too many "dimples" for that now.
WHY am I telling you this story? Did you really want an image of me and my "dimples" floating in your head when all you really wanted when you came here were freebies? Probably not, but the event did make me reminisce a bit about high school and the 80's. You remember...you know you do. Collared shirts that you would be forever pulling up around your neck, leg warmers, bangled bracelets...lots of them, Izod shirts and parachute pants?
Ok, so there are none of those things in this kit, it actually has NOTHING to do with the 80's except the colors. The colors remind me of "Preppy" 80's colors and so the name...and the story...and now your mental image of me in stirrup pants... sorry about that. Maybe the Freebie can cheer you up?
Elements and Alphabet tomorrow - hope to see you back!
Shauna
As always, click here or on the title to DOWNLOAD
Monday, December 10, 2007
12.11.07 Cardboard Christmas Part 3

You asked for it, so here it is! The third (and final?) installment of Pineapple Plantation Designs Cardboard Christmas! I've included a snowflake, a snowman, a present, a distressed cardboard background, a snowflake frame and a simple QP! I've got some new goodies for you guys tomorrow - hope to see you back then!
Thanks for those of you who have rated my site on Best Scrap Freebies! For those of you who haven't....... what are you waiting for?? LOL Hope your weekend was great!!
Aloha!
Shauna
Click here or on the title to DOWNLOAD
Sunday, December 9, 2007
12.10.07 Cardboard Christmas Part 2


So here is part two! I'm having so much fun with the cardboard...will there be a part 3??? Hmmmm.... perhaps!
There are two pictures for this freebie, so that you can see the QP. Just a simple layout with a cardboard background and I included the title with the download, but it is not on the QP, so you can use it if you like or use the page for something else.
See you all on Monday!!
Mele Kalikimaka
Shauna
12.09.07 Cardboard Christmas!

As always, click the title to download!
Ok, so I was planning on taking today off, but the kids were downstairs playing games, my husband was watching the Heisman Trophy Award, and...well, I was bored! So here it is, a Sunday Freebie for you
Torn cardboard seems to be all over lately, and I like it! So I thought I'd do some Holiday stuff for you. This is what I came up with... a tree that you can decorate yourself! Or use the elements in other creative ways... I sure wish you guys would send me some of your layouts, I'd love to see what you are doing with my posts...hint hint...
The lights come seperate from the tree so you can use them or not, and the ornaments can be sized to go small, on the tree, or large as other elements for layouts. It's also hard to see from the picture, but the ornaments come in "plain" and "glittery"! Again, I love a bit of grunge, with a bit of bling!!
By the way, I had so much fun with the cardboard thing that I have some more items to go with them! I'll post them later today or tomorrow, so keep an eye out!
Also, if you get a chance and have a minute, I'd love it if a few of you could rate my site on the Best Scrap Freebies site. Just click on the link to the left and look for my site (thanks to you all, it should be on the first page!) then click STATS next to the name (Pineapple Plantation Designs) then click Rate this site... Thanks so much!!
Aloha - Shauna
Saturday, December 8, 2007
12.08.07 Mini Holiday Kit with Bag Topper

So, I wanted to just make you all a cute little bag topper, you know... print it out, fold it in half and put it on top of small goodie bag...something simple and quick...LOL How come nothing I do seems to be simple and quick these days!?
At any rate, once I made the papers, the text, the ribbon and the little element to GO on the cute, (quick and simple) bag topper, I figured "well, they might want that stuff too"! So, here it all is, just a "quick, simple" little holiday kit... with 3 papers, a ribbon, some words, a glittery holly element...and your bag topper!
oh yeah... and I threw in the small pattern that I made for the middle paper just for good measure! LOL If you have any problems loading the pattern, (or just am not sure how to do that) PLEASE feel free to email me at PineapplePlantation@gmail.com and I would be HAPPY to send you a short tutorial - assuming of course that you're on Photoshop or Elements that is! LOL The pattern is a .png file, so anyone can use it...but I only know photoshop! LOL
Enjoy your weekend!
Shauna
Friday, December 7, 2007
12.07.07. Frost Kit Elements Add On

Good morning! (Or afternoon for many of you outside of Hawaii!) I have great news! My little blog here made #7 on the Best Scrap Freebies site! Thank you all for visiting my site, downloading my scraps and making this new little venture of mine a success - I've had so much fun!
Today's freebie is just a few items that I made for my Frost Kit, I used them in my QP for the kit and thought that I would make them available to you as well.
I'm still working hard on my next kit. I had meant for it to be ready in January (not holiday themed obviously) but I think that it will be ready much sooner than that! I'll keep you updated to it's progress and of course still continue to post little freebies for you each day, so please keep coming back, and send your friends too!
Much aloha!
Shauna
Thursday, December 6, 2007
12.06.07 Bonus Frost Kit Labels

CLICK HERE OR ON THE TITLE TO DOWNLOAD
Some labels that match my "Frost" Kit, or for whatever!
By the way...I'm looking for some help making a "blinkie" for my site, but I have no idea how to do it! If anyone is willing to help me make one, PLEASE email me! www.PineapplePlantation@gmail.com
I've been working diligently on creating a new kit for you... more vibrant colors. I hope to have it ready for this weekend or sometime early next week, please check back often!
Aloha!
Shauna
Wednesday, December 5, 2007
12.05.07 Plastic Snowflakes and Title Freebie!

Happy St. Nick's Eve! To celebrate this wonderful holiday I have some bright new elements and and title for you! I've posted my LO using them, (posted on DigitalDesigns.Com for their web challenge. You can download the title for this page at their website for free)
Enjoy!
Shauna
Tuesday, December 4, 2007
12.04.07 Frost Layout and Free Quick Page!

So in using my kit, I have certainly found a need for some more elements and there have been email requests for the label that I used on my first page with this kit, so I'll have those available for you this week! In the meantime Here is a Layout I did of my grandparents on their wedding day over 65 years ago! Again, not a wintery page, but the quote goes well with the photo I think. I hope you enjoy!
Shauna
DOWNLOAD BY CLICKING HERE OR ON THE TITLE ABOVE
12.03.07 Frost Kit Elements

Here are the elements to my new Frost Kit! I'll be doing some Quick Pages, so who knows? Perhaps there will be more!
As always, simply click the title above to download the zipped file for free!
Enjoy!
Shauna
Monday, December 3, 2007
12.02.07 Frost Kit Papers

So here are my new papers. I think I was inspired to do these after my call home to Wisconsin on Thanksgiving, my grandmother telling me about their first snow of the season and my memories of how the trees looked when they were first covered in snow. I dearly miss living in the midwest and seeing the change of seasons this, and the layout I made with it brought a bit of that back to me here in Hawaii. I hope you enjoy them as much as I did!
Check back tomorrow for the elements!
Aloha -
Shauna
Sunday, December 2, 2007
12.01.07 New Frost Kit - Sneak Peak!
Sorry no post yesterday, our internet was down most of the day (not a good thing, the kids and I nearly went mad! LOL)
At any rate, here is what I was going to post... I wanted some more delicate "wintery" elements to add to a scrapbook I'm making for my grandmother of my mom's baby pictures and I was having trouble finding any, so I made some! Here is one of the layouts that I did with it - not wintery, but I thought it looked nice. ( I usually like clean, simple and easy pages that spotlight the pictures and journaling).
I have several papers and elements that I will be posting on Monday and Tuesday... so please come back!!
Shauna
Friday, November 30, 2007
Christmas Kit Add Ons

Just a few last elements to add to my original Christmas kit (If you missed downloading the original kit simply click on the link to the left and download it as well!)
Again, the papers have been re-vamped for you too - enjoy your weekend and check back for a little surprise tomorrow!
Aloha -
Shauna
Christmas Kit Quick Pages 9-12

Here they are! The final pages of my brag book Quick Pages! It's been fun making them and I think that I might make this a regular thing... create a kit with papers and elements, do a few layouts and make some quick pages to go with the kit! From a designer's view point, I think it's almost necessary! I have seen so many "kits" out there that have the same old elements, frames, buttons, bows etc. and when I would go to use them I found that my layouts all looked the same... Maybe it will make my kits a bit better once I have to actually create several full layouts with them as well!
Having said that, I will be posting additional elements and papers that I made to go with the kit when I found that I needed a few different items. I also "upgraded" my original papers needed some help (some designs, and better textures). I'll make those tomorrow's posts so please come back to get those as well!
I'm also working on a new kit... much different from my last two, must softer and more delicate...it's called "Frost". Can't wait to share it with you next week! (Maybe parts of it this weekend?)
Mele Kalikimaka!
Shauna
Credits:Layout Design by Shabby Princess: Scraplifted from the cuddlebug quick pages check them out! www.ShabbyPrincess.Com
Thursday, November 29, 2007
Christmas Quick Pages 5-8

...The next installment of my quick and simple brag book pages. For those of you who asked, they are sized to be 8 x 8 pages, but they can always be sized smaller, and perhaps a bit bigger as well.
I've tried to leave the pages simple so that you can add elements, journaling and titles that suit your tastes. Also, quite a few of the pages aren't specifically tailored to Christmas, so you can use them for other events as well.
In addition, a quick tip... if you need more than 12 pages for your brag book, take the pages, and in your photo editing software, rotate the image or canvas - quite a few of the pages will look just different enough to pass as completely new ones!
Enjoy! Thanks for the comments and emails please keep them up, and Please...send me your finished pages if you'd like, I'd love to see what people are doing with my kits, and perhaps I'll post them on the blog!
Mele Kalikimaka! (Merry Christmas in Hawaiian)
Shauna
Credits:Layout Design by Shabby Princess: Scraplifted from the cuddlebug quick pages check them out! www.ShabbyPrincess.Com
Tuesday, November 27, 2007
Christmas Kit Quick Pages 1-4

You asked for Christmas quick pages and of course your wish is my command! Here are pages 1-4 for my Christmas Kit's Brag Book! I plan on doing at least 12 pages, so come back tomorrow for pages 5-8 and Thursday for pages 9-12. On Friday I will post a Christmas Kit Bonus Pack. It seems to be my most popular kit to date and with me doing the quick pages, I've had to create some more paper, I've added better textures to my other papers and I've created some additional elements as well. I'll post all of those on Friday.
PLEASE! If you like my blog, please click on the black flashing Icon to the left! It takes just a second to vote for my site
Also, in lieu of my starting my own mailing list, I've decided to use FeedBurner's email updater. You won't receive ANY spam if you sign up, you simply recieve a short email from them letting you know that I've updated my site and there is new items for you download!! There is also a small orange icon at the bottom of the blog if you would like to subscribe to my blog with an RSS feed FYI -
As always, the QP's are .PNG files so anyone should be able to use them! If you have any questions or problems with downloads, please let me know!
Shauna
PineapplePlantation@gmail.com
Credits:Layout Design by Shabby Princess: Scraplifted from the cuddlebug quick pages check them out! www.ShabbyPrincess.Com
Come Sail Away QUICK PAGE, Christmas Brag Book QP's to follow!

So... Jody left a comment requesting some QP's (quick pages), specifically a Christmas Brag Book - Thanks Jody! I think that it is a great idea and I'm getting started today working on them!
In the meantime, I wanted to use my Come Sail Away kit a bit today and I "grunged it up" a bit for a picture of my son Ethan this past week (NO, I did NOT alter the picture in any way...those really ARE the colors of the beaches here! LOL) I like the crispness of the photo compared to the gritty feel of the layout. I've posted my layout and did a few extra steps to create a .PNG file of the layout so that I could share the page with you all as well!
No, clipping masks needed, simply place your photo on a layer beneath the page and then size it to fit the frame!
It's really simple to create a "Grunge" overlay for your layouts to add to the kit, and if people are interested, feel free to leave a comment, perhaps I can give a short "tutorial" on creating the overlays! They're BIG money on the digital scrapbooking websites, but they are sooo easy to make! Let me know if anyone is interested!
I'd also be interested to know if anyone is interested in perhaps in me creating a mailing list. I WON'T clutter up your inbox, just simply drop you a note when I've posted a new kit or freebie! If you are, please send me an email to PineapplePlantation@gmail.com .
Enjoy your quick page and please come back tomorrow!
Shauna
*Edited to remove link*
Monday, November 26, 2007
Come Sail Away Elements

So here they are! I had a great time making this kit, and my first alphabet for download as well! The alphabet is a distressed chipboard alphabet, and I really like it - I hope you all do as well.
Please "leave some love" if you enjoyed the kit, you can leave a comment here on my blog, or as you wait for your download to complete. And certainly, feel free to make requests if you have them! I'm working on a "vintage feeling" kit right now for my mother's childhood pictures. If it turns out well, I'll certainly share!
Please stop by often as I plan to post smaller "goodies" daily in between my kits and if you like what you download and you use it, please send me a jpg of your work to post on the blog!! my email address for requests etc. is PineapplePlantation@gmail.com .
Have a great week!
Shauna
Thank you to Katie Petiet at DesignDigital.com ... she had similar Ledger .png files that she designed that inspired me to scraplift them and create some beach themed ones for this kit! All my work, all her idea!
*Edited to remove link*
Sunday, November 25, 2007
Come Sail Away Kit Papers

MY FIRST REQUEST! One of the comments left after my last kit was posted was from JJStar and she said "Great job! If you're up for a challenge, I've been looking for a kit to go with beach pictures and can't seem to find it!" So... between spending the week at the beach and talking to my family back in Wisconsin who said that it was below freezing I figured, "what the heck"? Maybe people can bring out those summer pictures and warm themselves up a bit! So here it is, my small attempt at my next kit.
Come Sail Away... it's not really a sailing themed kit, although I do have a touch of it, but the nautical colors reminded me of sailing, so there it is! The kit started out with VERY different colors and a more tropical/Hawaiian theme, but I wasn't sure if that would fit JJStar's request - p.s. if you leave a request, leave your email address or email me directly - you can have more input that way! - So I changed it quite a bit and I have enough of the other papers and elements to make a second kit! LOL If you want to see a preview of that kit, take a look at my TOU Page Layout in both the papers and elements portion of this kit, I made a cute layout of my son, perhaps I'll post it later this week, and then changed the pictures for my TOU (Terms of Use) Layout. If there is enough demand for a second summer kit this winter I'll post it!
So here are my papers, I love the colors in this kit...come back tomorrow for the elements - I think you'll LOVE them!
Aloha!
Shauna
*Edited to remove Link*
Saturday, November 24, 2007
Christmas Cards 1 and 2

CHRISTMAS CARD 1
(Credits: Template for 4x6 card from www.shabbyprincess.com as well as additional ribbon and tag - both altered by me)
Just back from the beach for Thanksgiving week and my days were spent on the beach reading, in the ocean boogie boarding, in our cabin playing Yahtzee with the kids, and the nights spent designing my next kit! It was requested by someone in a comment, and I couldn't wait to fill her request -
I also took some great pictures of my kids on the beach for our Christmas cards this year, which I've posted above and below. I have one favorite, and my husband has another. If I can figure it out I'll post a poll and see what you all think!
I'm putting the finishing touches on my next kit and I'll have it up either tomorrow or Monday at the latest.
Keep the requests coming, I can't wait to see what you have in store for me!
CHRISTMAS CARD 2
(Credits: Template from www.ShabbyPrincess.com VERY altered by me with papers from Shabby Princess as well)
Saturday, November 17, 2007
2 New Freebies! Holly Elements & Border plus Holiday Checklists

Click here to DOWNLOAD
So, I'm heading out for a week ladies! My family and I are going to the beach for Thanksgiving week. My husband is just back after 15 months in Iraq, and so we're taking a little vacation out to a beach called Bellows on the windward side of Oahu where we live. It's nothing but surf, sand, reading and relaxation! So here are my last Freebies until after Thanksgiving weekend! Have a great Day on Thursday (and try not to lose your mind or your entire savings account on Friday!).
The first freebie that I have for you before I go is a few small Holly Elements to decorate your pages, along with a 12" inch Holly border! (Just a little tip... if you want a shorter border, say for an 8" page or so, it's better to select the size you want with the Rectangle Marquee tool (this is for Photoshop or Photoshop Elements) and Copy and then paste to a new transparent file to use than it is to transform the original file (if you just move it in to make it shorter it distorts the holly, if you transform the file from the corners, keeping the dimensions the same, the border will be too small. So, just copy paste and use)!
Click here to DOWNLOAD
The second Freebie before I go are some Holiday Checklists. I am a strange breed of woman who is incredibly naturally messy and all over the place, but who SO longs to be orderly and organized! So I accepted that lists are my only hope!! Here are a few of my favorites... just thought I would share! They're 8.5 x 11 letter size files and the first list, my daily LIFESAVER, is actually 4 lists and this is how you use it:
Print out the sheet once, fold it into fourths and if I've orientated it correctly you should have a small booklet of sorts. Perfect size for your purse or pocket, it has all the necessities; TO DO, TO BUY, TO CALL and one I've left blank for your specific to do list. Just check off the things as you do them and then if you have some left, finish them off the next day (I take all unfinished items and move them to the next day's list so they don't pile up as I procrastinate! LOL)
The next is a simple Shopping List (for gifts OR groceries) Use the full page for a big trip, cut it in half for 2 smaller lists. And the last is a Gift Giving List this is a great list just to keep you on track of all your gifts this year. Write down the name of the person to buy for and the gift you plan to buy. Then once you buy the gift, check it off. When you wrap it, check it off, and then again when you ship or give it! There's also a place for the recipients address to take to the post office with you.
Hope they help, hope you enjoy and if you have a minute "leave me some love" with a comment or two!!!
Aloha until after Thanksgiving weekend!!
Shauna


